15 Sep 2017
I have migrated the blog to a whole new theme based on Jalpc.
All posts have been migrated into the new pages.
Please access here for now, url will be changed into default https://clarkdo.github.io after a short while.
14 Sep 2017
How to use batch in spring data JpaRepository
Configuration for batch size
spring:
  jpa:
    properties:
      hibernate.jdbc.batch_size: 4
Rewrite INSERT statements into multi-value inserts (only for MySQL)
- append
&rewriteBatchedStatements=true to spring.datasource.url
Verification by db log (MySQL as example)
$ mysqld --verbose --help | grep -A 1 "Default options"
mysql> SET GLOBAL log_output = "FILE";
mysql> SET GLOBAL general_log_file = "/path/to/your/logfile.log";
mysql> SET GLOBAL general_log = 'ON';
$ tail -f /path/to/your/logfile.log
SQL will be like:
178931 16:16:16	  66 Query	SELECT 1
	  566 Query	SET autocommit=0
	  566 Query	select @@session.tx_read_only
	  566 Query	insert into  emp (id, name, dep) values ('1', 'clark', 'IT'),('2', 'robin', 'Market'),('3', 'jeff', 'IT'),('4', 'emily', 'HR')
	  566 Query	insert into  emp (id, name, dep) values ('5', 'john', 'Sales')
How does spring data internally work ?
Add Insert Action
- call
SimpleJpaRepository.save (org.springframework.data.jpa.repository.support)
AbstractEntityManagerImpl.persist (org.hibernate.jpa.spi)SessionImpl.persist (org.hibernate.internal)SessionImpl.firePersist (org.hibernate.internal)DefaultPersistEventListener.onPersist (org.hibernate.event.internal)DefaultPersistEventListener.entityIsTransient (org.hibernate.event.internal)JpaPersistEventListener.saveWithGeneratedId (org.hibernate.jpa.event.internal.core)AbstractSaveEventListener.performSave (org.hibernate.event.internal)AbstractSaveEventListener.performSaveOrReplicate (org.hibernate.event.internal)AbstractSaveEventListener.addInsertAction (org.hibernate.event.internal)ActionQueue.addAction (org.hibernate.engine.spi)ActionQueue.addInsertAction (org.hibernate.engine.spi)ActionQueue.addResolvedEntityInsertAction (org.hibernate.engine.spi)- add
EntityInsertAction into EXECUTABLE_LISTS_MAP.get(AbstractEntityInsertAction)
Real insert execution when session flush
TransactionInterceptor.invoke (org.springframework.transaction.interceptor): it is called by proxy of business class whose method with @TransactionalTransactionAspectSupport.commitTransactionAfterReturning (org.springframework.transaction.interceptor): it is called after real business methodSessionImpl.beforeTransactionCompletion (org.hibernate.internal)SessionImpl.flush (org.hibernate.internal): get all flush type listeners’ (JpaFlushEventListener set from JpaIntegrator) onFlushDefaultFlushEventListener.onFlush (org.hibernate.event.internal): call super’s performExecutionsActionQueue.executeActions (org.hibernate.engine.spi): loop EXECUTABLE_LISTS_MAP.get(AbstractEntityInsertAction to execute every action.EntityInsertAction.execute (org.hibernate.action.internal): call SingleTableEntityPersister.insertAbstractEntityPersister.insert (org.hibernate.persister.entity): if use batch, add insert action to BatchingBatchBatchingBatch.addToBatch (org.hibernate.engine.jdbc.batch.internal): if reached the batch_size, then perform executionBatchingBatch.performExecution (org.hibernate.engine.jdbc.batch.internal)PreparedStatement.executeBatchInternal (com.mysql.jdbc): should set rewriteBatchedStatements if want to execute within batch sqlPreparedStatement.executeBatchedInserts (com.mysql.jdbc): Rewrites the already prepared statement into a multi-value insert and executes enw statement
15 Aug 2017
Initialize properties
HibernateJpaAutoConfiguration super class JpaBaseConfiguration enables JpaPropertiesJpaProperties fetch all spring.jpa.hibernate.* or spring.jpa.properties.hibernate.* into a mapentityManagerFactoryBuilder initialize EntityManagerFactoryBuilder with properties aboveEntityManagerFactoryBuilder put properties into JpaPropertyMap
Initialize bean with properties
JpaBaseConfiguration.entityManagerFactory build LocalContainerEntityManagerFactoryBeanLocalContainerEntityManagerFactoryBean call buildNativeEntityManagerFactory- then call
createNativeEntityManagerFactory
SpringHibernateJpaPersistenceProvider.createContainerEntityManagerFactory create EntityManagerFactoryBuilderImplStandardServiceRegistry create StandardServiceRegistryBuilder and build StandardServiceRegistryImplEntityManagerFactoryBuilderImpl pass properties into ssrBuilder.build() via configurationValuesStandardServiceRegistryBuilder create bunch of initiators, such as: BatchBuilderInitiator
01 Aug 2017
构造(Constructor)注入
使用构造(Constructor)注入需要将依赖作为构造函数的参数, 由于构造函数必须被调用, 因此强制的保证了依赖的初始化, 并且也将代码的依赖管理与 Spring 解耦, 实现了容器无关.
从 Spring 4.3 开始, 在只有一个构造器的类上, @Autowired注解可以不需要显示指定. 这是特别优雅的, 因为它使得类将不携带任何容器注释. 基于此点, 同样从 Spring 4.3 开始, @Configuration也开始支持构造(Constructor)注入, 并且在单构造器的情况下不需要指定@Autowired
import javax.inject.Inject;

public class Foo {

    private Bar bar;

    @Inject
    public Foo(Bar bar) {
        this.bar = bar;
    }

}
设值(Setter)注入
使用设值(Setter)注入, setter是否被调用具有不确定性, 因此对象实例可能永远不会得到依赖的组件. 唯一的方式是将@Autowired或@Inject等注解添加到setter上, 同时也打破了容器无关性.
import javax.inject.Inject;

public class Foo {

    private Bar bar;

    @Inject
    public void setBar(Bar bar) {
        this.bar = bar;
    }
}
Spring Team 推荐
由于可以将构造(Constructor)注入和设值(Setter)注入混合使用, 因此将构造(Constructor)注入作为必填依赖的策略, 设值(Setter)注入作为可选依赖的策略会是一个不错的做法. 同时, 在setter使用@Required注解可以将依赖变为必需的依赖.
Spring team 主张使用构造(Constructor)注入, 因为它实现了将不可变对象作为应用组件, 从而保证了必需的依赖不能为空. 此外, 构造(Constructor)注入组件总是会返回包含完全状态的客户端(调用端)代码. 附注一点: 大量的构造参数是一个坏的代码味道,这意味着该类可能包含了太多的责任,应该进行重构以更好进行关注点分离。
设值(Setter)注入应当主要用于可选依赖的管理, 这些依赖可以被赋以合理的默认值. 否则, 所有使用到该依赖的位置都要添加非空检测. 设值(Setter)注入的好处则是setter方法使得对象实例可以被重复配置和注入. 通过JMX管理通过设值(Setter)注入的依赖就是一个引人注目的方式.
对于一个特定的类需要使用最合理的依赖注入方式. 有时, 当使用第三方没有源码的类时, 选择就已经为你做好了. 例如: 如果一个第三方类没有暴露出setter方法, 这时构造(Constructor)注入就是唯一的选择了.
25 Jul 2017
参考自: AngularJS Git Commit Message Conventions
commit message 的格式
<type>(<scope>): <subject>
<BLANK LINE>
<body>
<BLANK LINE>
<footer>
每行不能超过100个字符! 会使 github 以及各种 git 工具上的信息更加易读.
Subject
Subject 包含对于本次修改的简要描述.
<type>
- feat (功能性)
- fix (bug 修复)
- docs (文档)
- style (代码样式, 例如: 缺少分号等)
- refactor (重构)
- test (添加确实的测试用例)
- chore (日常维护)
<scope>
Scope 可以是任意指定了本次变更相关的信息. 例如: $location, $browser, $compile, $rootScope, ngHref, ngClick, ngView 等等…
<subject>
- 使用祈使句, 现在式时态: “change”, 而不是 “changed” 和 “changes”
- 不要大写一个字母
- 结尾无需句号
Message body
- 和 一样使用祈使句, 现在式时态: “change”, 而不是 “changed” 和 “changes”
- 包含本次变更的动机和变更前后的差异
http://365git.tumblr.com/post/3308646748/writing-git-commit-messages
http://tbaggery.com/2008/04/19/a-note-about-git-commit-messages.html
Breaking changes
所有重大改动必须在底部提及本次改动的描述信息, 理由以及迁移说明
BREAKING CHANGE: isolate scope bindings definition has changed and
    the inject option for the directive controller injection was removed.

    To migrate the code follow the example below:

    Before:

    scope: {
      myAttr: 'attribute',
      myBind: 'bind',
      myExpression: 'expression',
      myEval: 'evaluate',
      myAccessor: 'accessor'
    }

    After:

    scope: {
      myAttr: '@',
      myBind: '@',
      myExpression: '&',
      // myEval - usually not useful, but in cases where the expression is assignable, you can use '='
      myAccessor: '=' // in directive's template change myAccessor() to myAccessor
    }

    The removed `inject` wasn't generally useful for directives so there should be no code using it.
Referencing issues
被关闭的 bug 应该另起一行在底部单独列出, 并且使用 “Closes” 前缀, 例如
or in case of multiple issues:
23 Jul 2017
打开 iTerm, 进入 Preferences > Keys, 点击 + 进行设置.
清空整行
- Keys:
⌘+⟵(Delete)
- Action:
Send Hex Code
跳至行首
- Keys:
⌘+←
- Action:
Send Hex Code
跳至行尾
- Keys:
⌘+→
- Action:
Send Hex Code
删除整行
- Keys:
⌥+⟵(Delete)
- Action:
Send Hex Code
按单词删除
- Keys:
⌥+fn+⟵(Delete)
- Action:
Send Escape Sequence
向左跳过单词
- Keys:
⌥+←
- Action:
Send Escape Sequence
向右跳过单词
- Keys:
⌥+→
- Action:
Send Escape Sequence
13 Jun 2017
�Feign Ribbon Configuration
- FeignAutoConfiguration
- initialize
feignContext
- initialize
feignFeature
- FeignRibbonClientAutoConfiguration
- initialize CachingSpringLoadBalancerFactory
cachingLBClientFactory which holds springClientFactory
- initialize LoadBalancerFeignClient
feignClient which holds Client.Default which holds cachingLBClientFactory and springClientFactory
构建FeignClient注解代理对象
- FeignClientsRegistrar.registerFeignClient
- FeignClientFactoryBean.getObject
- FeignClientFactoryBean.feign
- context.getInstances(this.name, RequestInterceptor.class) (context is
FeignContext)
- BeanFactoryUtils.beansOfTypeIncludingAncestors
- FeignClientFactoryBean.loadBalance
- FeignClientFactoryBean.getOptional
- FeignContext.getInstance(Client.class) (context from
FeignAutoConfiguration)
- Feign.Builder.getClient (object from
FeignRibbonClientAutoConfiguration.feignClient)
- Feign.target
- ReflectiveFeign.newInstance
- proxy Target.HardCodedTarget(type:
@FeignClient annotation.getClassName)
- bind proxy handler to InvocationHandlerFactory.Default() -> ReflectiveFeign.FeignInvocationHandler -> SynchronousMethodHandler(client: step 5)
调用Feign接口
- call proxy: SynchronousMethodHandler.invoke
- SynchronousMethodHandler.targetRequest apply requestInterceptors
- LoadBalancerFeignClient.execute (client: LoadBalancerFeignClient -> FeignAutoConfiguration.feignContext && FeignRibbonClientAutoConfiguration.feignClient -> above step 5)
cachingLBClientFactory creates FeignLoadBalancer object which holds FeignLoadBalancer under specific namespace configs
- FeignLoadBalancer.executeWithLoadBalancer
- LoadBalancerCommand.submit
- LoadBalancerCommand.selectServer
- FeignLoadBalancer.reconstructURIWithServer
- FeignLoadBalancer.execute
- Client.Default.execute
03 Apr 2017
翻译
东京 Tokyo
| 中文 |
日文 |
| 上野 |
Ueno |
| 入谷 |
Iriya |
| 秋葉原 |
Akihabara |
| 仲御徒町 |
Naka-okachimachi |
| 淺草 |
Asakusa |
| 銀座 |
Ginza |
| 築地市場 |
Tsukijishijo |
| 二重橋前 |
Nijubashimae |
| 神谷町 |
Kamiyacho |
| 麻布十番 |
Azabu-juban |
| 六本木 |
Roppongi |
| 惠比壽 |
Ebisu |
| 中目黑 |
Naka-meguro |
| 澀谷 |
Shibuya |
| 表參道 |
Imote-sando |
| 明治神宮 前 |
Meiji-jingumae |
| 新宿 |
Shinjuku |
| 東新宿 |
Higashi-shinjuku |
| 新宿西口 |
Shinjuku-nishiguchi |
| 池袋 |
Ikebukuro |
| 自由丘 |
Jiyugaika |
| 三鷹 |
Mitaka |
| 吉祥寺 |
Kichijoji |
| 下北澤 |
shimo-kitazawa |
富士山 Fujiyama
|中文|日文|
| — | — |
|河口湖駅|Kawaguchiko Station|
|山中湖|Lake Yamanaka|
富士急行巴士到达河口湖都是停在河口湖站(就是搭电车富士急行线下车的车站)
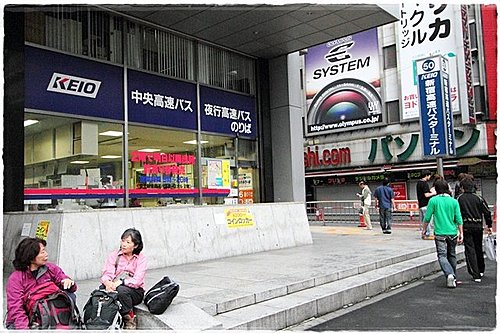
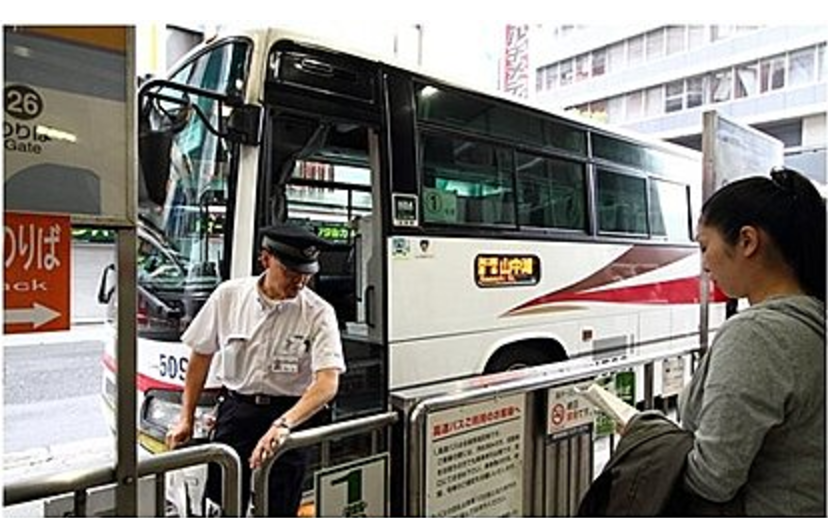
富士五湖-新宿线
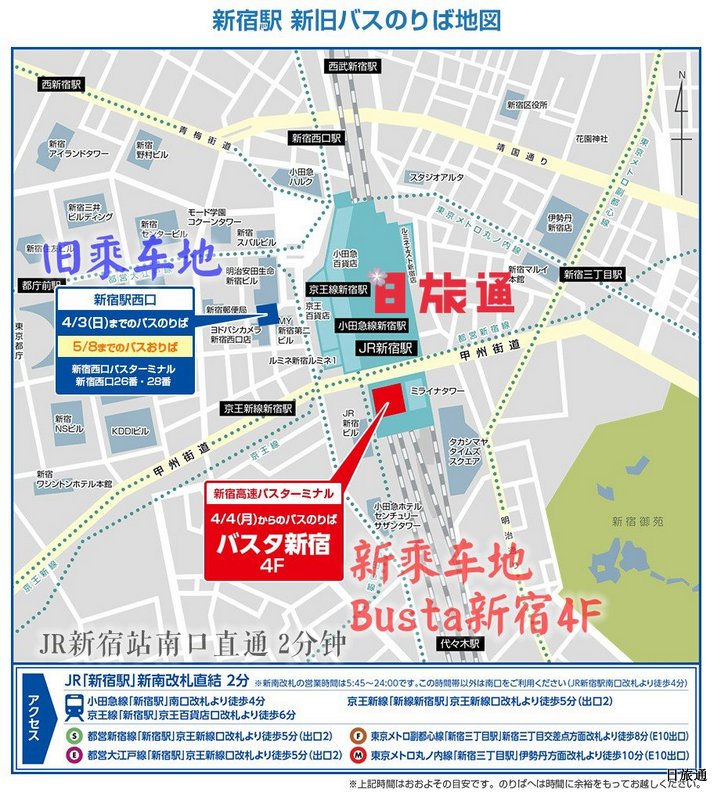
- 在新宿高速巴士总站上车,车程不到两小时,车次密集(上午半小时一班,下午一小时一班) 中文时刻表及票价表
- 新宿到河口湖票价白天1750日元(约人民币90元),晚上2650日元(约人民币137元)
- 需注意这个路线的巴士一部分是以河口湖为终点,一部分以山中湖为终点, 上车前最好确认好终点,或把河口湖写在纸上让司机提醒下车,以免坐过站
| |
|
|
|
運賃 |
| 新宿高速巴士總站 |
6:05 |
7:15 |
7:45 |
|
| 河口湖站 |
7:54 |
9:00 |
9:30 |
1,750日圓 |
| 山中湖 旭日丘 |
— |
9:29 |
9:59 |
2,050日圓 |
河口湖-东京线
- 在东京站上车,每两小时一班,车程2小时40分, 从东京站到河口湖站票价1750日元(约人民币90元) 中文时刻表及票价表
| |
|
|
|
|
運賃 |
|
| 東京站八重洲南出口 |
6:20 富士急 |
6:50 JR |
7:20 JR |
7:40 富士急 |
|
|
| 東京站八重洲北出口(Tekko 大樓)利木津巴士站 |
6:25 |
— |
— |
— |
|
|
| 河口湖站 |
8:42 |
8:52 |
9:22 |
9:47 |
1,800日圓 |
|
| 山中湖 旭日丘 |
— |
— |
— |
— |
— |
2,100日圓 |
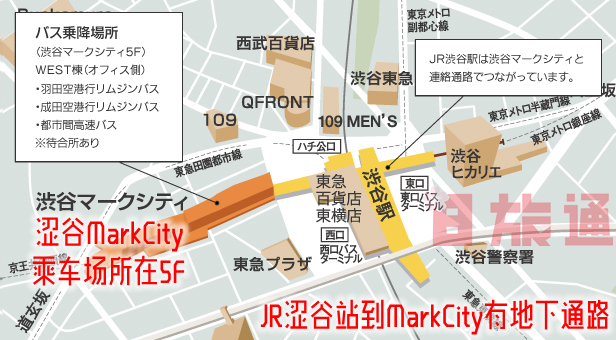
涩谷-富士山/河口湖线
- 在涩谷MarkCity上车,上午一小时一班,下午两小时一班,车程一个半小时, 以富士山站为终点,河口湖是倒数第二站,票价1800日元(约人民币93元)

- 从富士急行河口湖线河口湖站搭乘开往本栖湖方向的富士急山梨巴士(河口湖駅-本栖湖方面行きバス),25分钟后于富士绿之休暇村(富士緑の休暇村)下车,步行3分钟
- 10:00-21:00(22:00闭馆), 鸣泽村8532‐5
去程
| |
|
|
|
|
|
|
| 河口湖駅 |
5:38 |
8:58 |
9:38 |
9:58 |
10:38 |
11:38 |
| 富士緑の休暇村 |
6:00 |
9:20 |
10:00 |
10:20 |
11:00 |
12:00 |
返程
| |
|
|
|
|
|
|
|
| 富士緑の休暇村 |
11:55 |
14:00 |
16:00 |
16:10 |
17:20 |
19:00 |
22:00 |
| 河口湖駅 |
12:17 |
14:22 |
16:22 |
16:32 |
17:42 |
19:22 |
22:22 |
乘车 河口湖-御殿场奥特莱斯 官网时刻
河口湖站6号乘车口
| 河口湖駅6番バスのりば |
御殿場 プレミアムアウトレット |
運賃 |
| 13:30 |
15:05 |
¥1,510 |
| 14:30 |
16:05 |
|
| 15:30 |
17:05 |
|
| 17:00 |
18:35 |
|
- 票价-成人单程1510日元(约人民币78元)
- 需注意这趟车先到御殿场站再到奥特莱斯,不要提早下车
乘车 御殿场奥特莱斯-东京 官网时刻
JRバス
| 御殿場プレミアム・アウトレット |
池尻大橋 |
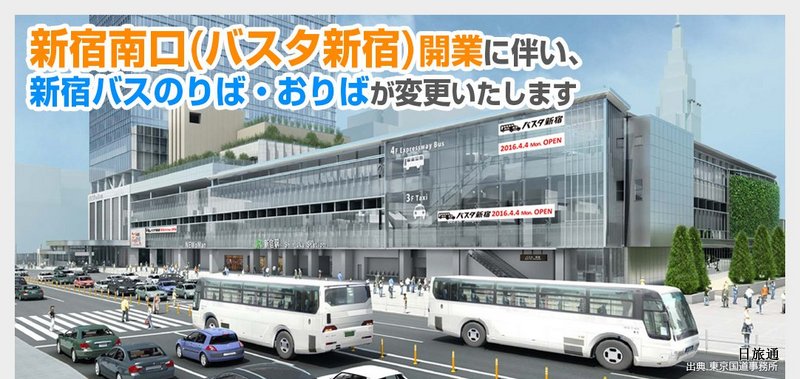
新宿高速バスターミナル(バスタ新宿) |
運賃 |
| 16:00 |
17:15 |
17:45 |
¥1,650 |
| 17:00 |
18:15 |
18:45 |
|
| 18:00 |
19:15 |
19:45 |
|
| 19:00 |
20:15 |
20:45 |
|
小田急箱根高速バス(御殿場プレミアム新宿号)
| 御殿場プレミアム・アウトレット |
池尻大橋 |
新宿高速バスターミナル(バスタ新宿) |
運賃 |
| 16:00 |
17:21 |
17:45 |
¥1,650 |
| 18:00 |
19:21 |
19:45 |
|
| 19:00 |
20:06 |
20:45 |
|
東京駅発着
| 御殿場プレミアム・アウトレット |
新宿高速バスターミナル(バスタ新宿 |
東京駅日本橋口 |
運賃 |
| 15:00 |
- |
16:40 |
¥1,650 |
| 16:00 |
17:45 |
18:15 |
|
| 16:30 |
- |
18:10 |
|
| 17:00 |
18:45 |
19:15 |
|
| 17:30 |
- |
19:10 |
|
| 18:00 |
19:45 |
20:15 |
|
| 19:00 |
20:45 |
21:15 |
|
16 Feb 2017
结构化代码
Spring Boot 不需要任何特定的代码布局工作, 但是, 下面这些最佳实践可能会有帮助.
使用”默认”包
当类不包含 package 声明时, 则被认为是”默认包”. 通常来讲是不鼓励用”默认包”的, 且应该避免这种用法. 在使用 @ComponentScan, @EntityScan 或 @SpringBootApplication 时, 可能会引起 Spring Boot 应用特有的问题, 因为 jar 内的所有类都会被读取.
推荐遵循下面 Java 推荐的包命名约定,使用反向域名(例如, com.example.project).
放置主应用类
通常推荐将主应用类放置在高于其他类的根 package 内. @EnableAutoConfiguration 经常被放在主类上, 它隐式地定义了某些项的基本”搜索包”. 举例来说, 如果你写了一个 JPA 的应用, 标记了 @EnableAutoConfiguration 的类所在的包会被用于扫描 @Entity 项.
使用根 package 同样允许使用不指定任何 basePackage 属性的 @ComponentScan 标记. 如果主类在根 package, 可以使用 @SpringBootApplication.
下面是一个典型的布局:
com
 +- example
     +- myproject
         +- Application.java
         |
         +- domain
         |   +- Customer.java
         |   +- CustomerRepository.java
         |
         +- service
         |   +- CustomerService.java
         |
         +- web
             +- CustomerController.java
Application.java 文件会声明主方法, 伴随着基本的 @Configuration.
package com.example.myproject;

import org.springframework.boot.SpringApplication;
import org.springframework.boot.autoconfigure.EnableAutoConfiguration;
import org.springframework.context.annotation.ComponentScan;
import org.springframework.context.annotation.Configuration;

@Configuration
@EnableAutoConfiguration
@ComponentScan
public class Application {

    public static void main(String[] args) {
        SpringApplication.run(Application.class, args);
    }

}
03 Feb 2017
后端
2016 总结
1.Dubbo & Zookeeper -> Spring Cloud Netflix(Eureka, Zuul, Hystrix, Ribbon, Feign), Swagger, JWT, Metrics, Config Server 等技术
演进理由:
- Spring Cloud 社区活跃度优于 Dubbo
- Spring Cloud 架构更加完整, 是一套完整应用的开发方案
- Dubbo 已基本停止维护, Latest release: released on 30 Oct 2014
| |
Dubbo |
Spring Cloud |
| 服务注册中心 |
Zookeeper |
Spring Cloud Netflix Eureka |
| 服务调用方式 |
RPC |
REST API |
| 服务网关 |
无 |
Spring Cloud Netflix Zuul |
| 断路器 |
不完善 |
Spring Cloud Netflix Hystrix |
| 分布式配置 |
无 |
Spring Cloud Config |
| 服务跟踪 |
无 |
Spring Cloud Sleuth |
| 消息总线 |
无 |
Spring Cloud Bus |
| 数据流 |
无 |
Spring Cloud Stream |
| 批量任务 |
无 |
Spring Cloud Task |
2.SVN -> Git
演进理由:
- 分布式, 快速, 支持离线工作, 回退功能强大
- 可以引入更加灵活的开发模式, 保持工作自由且独立
- 社区的强大优势
3.以Git为基础, 引入2种较之前更加灵活的开发及测试模式
- Git Flow(排片项目)
- Trunk Based(基础数据项目)
4.将容器化技术带入到2个项目的全流程中(排片, 基础数据), 更快速的辅助了新的开发与持续集成模型
2017 展望
1.完成公司方向性任务, 以及技术细节的改进(lombok, Guava等)
2.能否不仅仅依赖Spring社区, 而更有针对性引入框架技术(Netty, RxJava, Vert.x, Play等)
3.数据库层面同上, 不仅仅依赖Redis, MySql, 能否针对业务考虑对应数据库(PG, Mongo, Cassandra, ES, Neo4j等)
4.服务链路追踪以及服务治理深入研究
5.服务限流和容错的细化方案
6.网关对于访问量, 调用延迟,错误计数和访问模式的监控及预警
7.监控做到事故预警, 故障定位, 优化决策及行为数据分析
8.容器化技术进一步落地 (镜像中心, 容器集群管理), 支持微服务的部署混合化(自建机房+云), 弹性伸缩
前端
2016 总结
1.实现分模块打包, 各前端项目独立开发
2.优化前端加载效率
2017 展望
1.基于React,Vue或Ng 开发新版轻量级前端基础代码()
2.封装组件库
3.使用新构建及打包工具(Yarn, Webpack)
4.在新版代码中, 使用ES6进行开发(Babel)
5.采用服务端渲染, 并构建NodeJS应用(Express, Koa)
6.实践前端代码样式检测(ESLint), 单元测试(Jasmine, PhantomJS)
7.尝试使用Typescript或Coffeescript
8.HTTP2.0改造